← Home About Articles Photos Cycling auf Deutsch Archive Also on Micro.blog
  • Tiff Stevenson interviews Andy Zaltzman on her podcast Tiny Revolutions

    Utterly great comedian Tiff Stevenson last week had had Andy Zaltzman on her podcast, where she interviews various comedians and artists about the tiny revolutions in their lives. The conversation these two had is brilliant and features a lot of history of The Bugle, which has been my favourite podcast for almost 13 years.

    I honestly find it hard to express how much joy The Bugle has brought me. I first found it by accident in late 2008 when I was in a bit of a stand up comedy show discovery phase while studying in Beijing. It popped up in the recommendations in Apple Podcasts and after the first listen, I was hooked.

    When John Oliver left because, as Andy tells it, it just wasn’t possible to do Last Week Tonight and a weekly transatlantic podcast, I was gutted and very sad but obviously kept listening. The reimagined show, where Andy is joined by two correspondents every week, has been, in my opinion, the best thing that could’ve happened. I’d still love to see John Oliver return every now and then but the roster of people Andy is bringing on from around the world, all of them with their own perspectives, is hard to beat.

    I was introduced to so many extremely funny comics: first and foremost Alice Fraser, as well as (and in no particular order) Tiff Stevenson, Nish Kumar, Aditi Mittal, Josh Gondleman, Anuvab Pal, Charlie George, James Nokise, Felicity Ward, Alison Spittle, and many, many more.

    There are alerady two spin-offs, both hosted by Alice Fraser:
    The Gargle, in which Alice and guests tackle anything that isn’t political news, and The Last Post, The Bugle from a parallel universe.

    If you like satire, sillyness, and can handle puns, check out The Bugle and its sister shows. I’ll see you again in about 9 months, once you reemerge from the binge cave. 😁

    → 09:03, 24 Jun 2021
  • Well, Lightroom it was and Lightroom it is

    Over the past few days I’ve been looking at potential alternatives to Adobe Photoshop Lightroom for my RAW processing and photo editing needs. It’s not that there’s a lot wrong with Lightroom, really. I’ve been using the applications, particularly those on iOS with satisfaction. With the renewal of my annual subscription coming up, I wanted to see what else is out there, at this point.

    A few friends and acquaintances helped me with some recommendations and I took time to test them:

    • Capture One Fujifilm surprised me with a decent UI and a significantly better rendering of Fujifilm RAF files than Lightroom. I’d read about that but didn’t think the difference would be this stark. Adobe should really do their homework there. Sadly, the macOS app was slow, slower than Lightroom. While that was disappointing, the complete lack of an iOS application disqualified it for me.
    • Next up, I gave Affinity Photo a try and this app really shone for a number of reasons, including a very responsive user interface. The RAW renderer wasn’t as good for Fujifilm files as Lightroom’s, though. But the more important reason why I didn’t go deeper into it was the fact that this application is simply too much for my needs. It’s much closer to Photoshop than to Lightroom or Aperture (R.I.P Aperture 😢) and that’s overkill for me.
    • The last one in the pack, Pixelmator Photo, has no macOS application. I can forgive that but it doesn’t read Fujifilm RAF files at all, which would mean I’d have to convert everything into DNG first. That’s a non-starter. It’s also an app that feels very similar to Affinity Photo. Since I have a licence for it anyway (as I do for every app the Pixelmator team have produced), it stays on my iPad for situations where Lightroom is too limited for a specific task.

    It was good to see what the market currently offers and what I found was a) solid choices for different sets of needs and b) the realisation that Lightroom still fits my requirements best by

    • having good, responsive iOS applications,
    • an okay macOS offering,
    • solid synchronisation of data and editing progress,
    • decent if not perfect rendering of Fujifilm RAF files,
    • and 1 TB of storage space, which works out as a very usable puzzle piece in my photo backup strategy.

    If I had one wish for the Lightroom apps, it would be for Adobe to bring back geotagging. I miss this dearly from the classic Lightroom app.

    → 10:25, 15 Mar 2021
  • First impressions: e*thirteen XCX Plus 11-speed & TRS Plus Gen 2 12-speed cassettes

    The e*thirteen XCX Plus 9–39 11-speed cassette has been on my gravel bike for over a month now and I’ve ridden over 250 km with it so far. It replaced a Shimano XT CS-M8000 11–40 cassette that I’ve ridden for over a year and countless of kilometres. These are my first impressions of the cassette.

    e\*thirteen XCX Plus 9-39 cassette and a Shimano RD-RX800 rear derailleur on a titanium bike

    • Shifting is crisper but a bit more fiddly to set up. I don’t know if it’s the higher number of shift gates or the tooth profile but it took me a while to get shifting right on the bike stand. The cassette would react more quickly to less than optimal indexing. Once tuned properly, I found that it shifts quicker, even under load, and the shift action feels more positive.
    • It’s louder. Not to the point where it annoys me but it took a bit of getting used to. I assume the lightweight construction with the large hollow space amplifies chain noise and shifting sounds.
    • The cassette feels solid and it has yet to show any signs of wear.
    • Chain wrap on the 9-tooth cog doesn’t seem to be an issue. I had read this in a couple of places and was worried that going with such a small cog for the highest gear could cause chain skipping but I’ve not had a problem. Mind you, I’m using a Ultegra RD-RX800 rear derailleur and a Shimano 105 11-speed chain (didn’t want to put on a fresh Ultegra chain, just yet) and I’ve properly adjusted the B-screw tension. Even going full-bore on a flat section, putting as much power as I can into it, hasn’t caused any problems (more on that further down).
    • With the chain on the smallest cog and depending on the chainring used up front (32-tooth and 36-tooth for my bicycles), the chain will be very close to the rear end of the chain stay. Depending on the bike, this may not fit at all. On my Litespeed T5G, I’ve noticed some chain slap going down fast and bumpy descents in the 9-tooth cog, even with a clutch rear derailleur. This is something I’ve never experienced with the 11-tooth cog on the XT cassette and it may be a deal breaker for some.
    • Lastly, and this is not something I’d ever see myself write: it’s noticeably lighter than the cassette it replaced. Sure, ~ 100 g might not sound like much to a less experienced cyclist such as myself but the back wheel seems just a bit more nimble, riding across bumpy gravel tracks.

    All in all I’m happy with the cassette so far. It’s done exactly what I had hoped it would when converting my bike from a 2× 11 to a 1×11 system. With a 32-tooth chainring up front, the 9–39 spread in the back gives me an ample gear range, an easy 0.82 gear ratio in the lowest gear, a reasonably fast 3.55 gear ratio in the highest gear, and fairly tight and even gear spacing, particularly in the higher gears.

    In fact, I’ve been so happy with this piece of kit that I bought an e*thirteen cassette for my city/commuter/road bike that has, up until recently, sported a full SRAM NX Eagle group with a 11–50 cassette and a 32-tooth chainring. I replaced the NX Eagle cassette with the 2nd generation TRS Plus 12-speed 9–46 cassette and the front chainring with a 36-tooth (soon 38-tooth).

    Based on my initial experiences with the 9–39 on my gravel bike, what drew me to the 9–46 12-speed was a) the lower weight, b) the greater range of 511% on the e*thirteen compared to 455% on the NX Eagle, while at the same time offering c) a much tighter and, in my eyes, more sensible gear spacing in the higher gears. The first six gears on the TRS Plus cassette are 9, 10, 12, 14, 16, 18 where on the NX Eagle the jumps are 11, 13, 15, 17, 19, 22. My first road ride with the new cassette was a 45 km trip mostly on the road up a local mountain and then down again and I very quickly appreciated the choices made by e*thirteen.
    Finally, chain wrap on the 9-tooth cog is perfectly fine with a SRAM Eagle rear derailleur and a GX Eagle chain. I tried a couple of times to produce any kind of skipping, riding at 80 rpm, on a slight incline, pushing 42 km/h (yes, I was very much winded after) and I experienced no issues whatsoever.

    I’m looking forward to many more kilometres with these cassettes and I’ll write a long term review at a later point.

    → 11:17, 13 May 2020
  • Apple doesn't care about audio quality my butt, Neil Young

    By internet time this story is ages old, I know, but I was reminded again that Apple cares about audio quality and why Neil Young is so.very.wrong. 😉
    He made a few waves in the tech sphere in late January by stating something to the effect of the Apple’s MacBook Pro having a shit DAC (Digital Analogue Converter) and Apple generally caring more about consumerism than creating high quality audio equipment for professionals.

    Jim Dalrymple thoroughly debunked any of the claims made by Young on The Loop weeks ago but I wanted to offer a different example:
    The Apple Lightning/USB-C to 3.5 mm Headphone Jack Adapter

    Many people make fun of these little dongles and I get it. Apple removed the headphone jack from its iPhone and iPads and replaced it with an easy-to-lose USD 9.— dongle and they called it courage. My feelings about the dongle went from a solid meh (#donglelyfe) to loving these little things, seriously loving them. The reason is simple: they have amazing sound quality.

    In more technical terms (source 1, source 2):

    • The output source impedance measures > 1Ω.
    • Frequency response is close to perfectly flat.
    • Harmonic distortion is almost nonexistent across various resistances (Ω).
    • Dynamic range is on par with previous iPhone headphone jacks, which had great audio quality

    In less technical terms it means that these little dongles can drive extremely sensitive earphones with no to absolutely minimal changes to the frequency response (their sound signature) on the one hand and can also power full-size headphones on the other hand. To get this kind of flexibility and sound quality, you’d typically have to buy and lug around a dedicated portable DAC.

    My earphones of choice are the Campfire Audio Andromeda, great sounding earphones that are very hard to drive properly. Sources with an output resistance of larger than 1Ω will quickly and negatively impact the sound signature, starting with reducing the bass response dramatically.

    Using Apple’s dongles, they sound brilliant, same as they do on my MacBook Pro. I even use the USB-C dongle to listen to music on the Microsoft Surface Pro 2 that I use for work a lot. Its 3.5 mm audio jack is … not good, to be polite. With a USB-A to USB-C adapter and the USB-C audio dongle (again #donglelyfe), I get perfect audio quality listening to losslessly compressed music.

    So no, Mr. Young, Apple does care about audio quality even on a consumer level. And what I use for proof are these tiny, easy-to-lose, beautifully sounding, flexible dongles.

    → 11:05, 27 Feb 2020
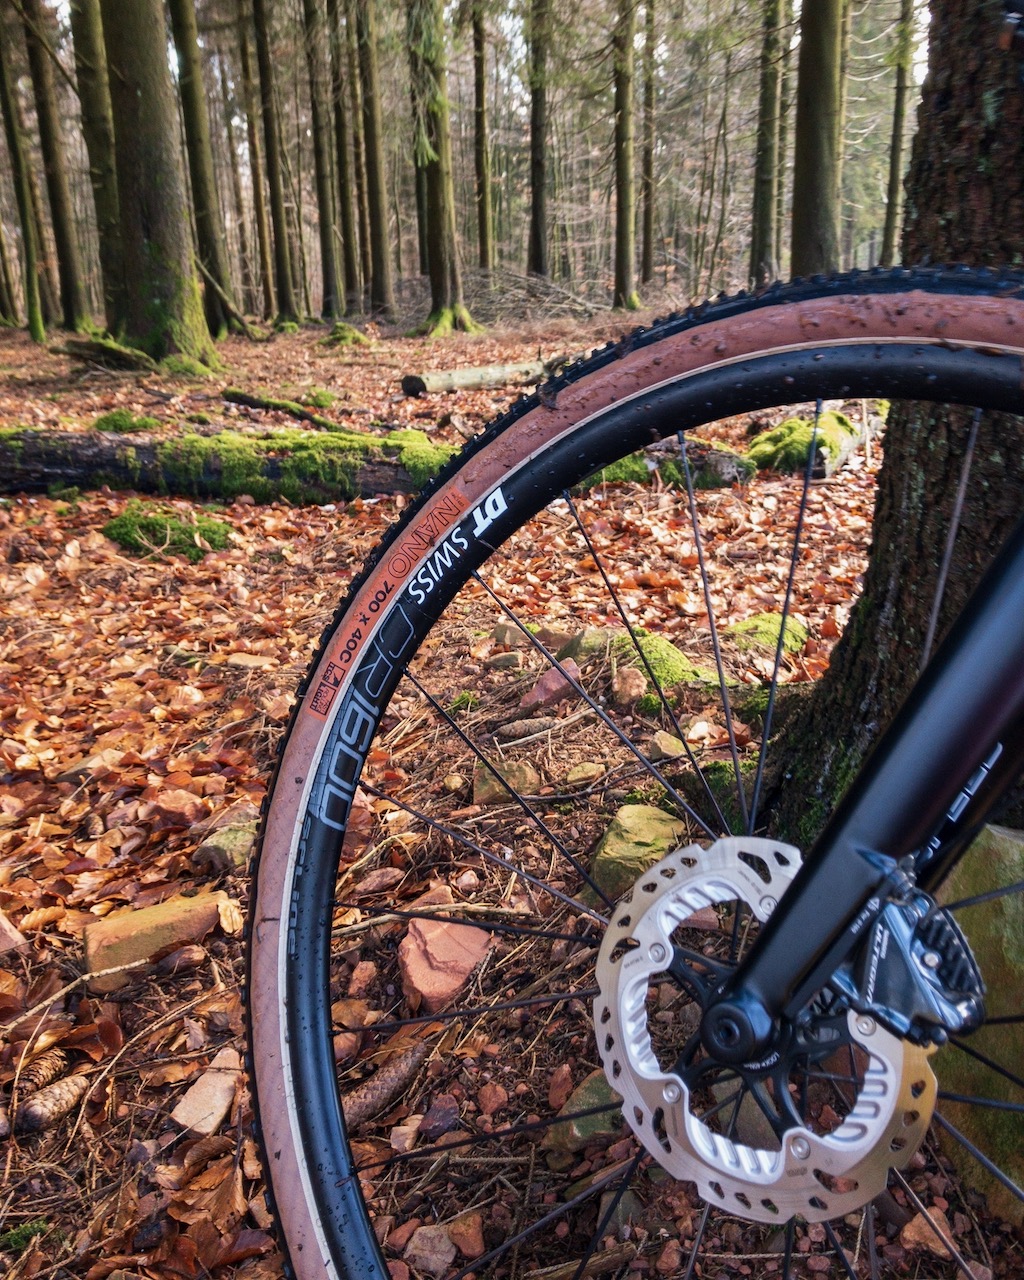
  • First ride with the WTB NANO 40

    On Wednesday, in an attempt to make good use of the surprisingly sunny weather, I took my gravel bike out for a first ride with the WTB Nano 40.

    Wtb NANO 40 on DT Swiss CR1600 Spline db 23 wheels in the forest

    My recent experiment of using 650b × 47 mm tyres on my bike failed due to tyre rub on the left chain stay, yes, but it gave me a taste of what wider, higher-volume tyres with an aggressive tread could do for riding gravel and some tame singletrack. So after doing some research on 700×40c rubber, I had high hopes for the WTB NANO 40.

    (I set up the tyres tubeless with Muc-Off’s No Puncture Hassle Tubeless Sealant and inflated them to 37 psi up front and 38 psi in the back referencing the handy tubeless tire pressure recommendations published by ENVE.)

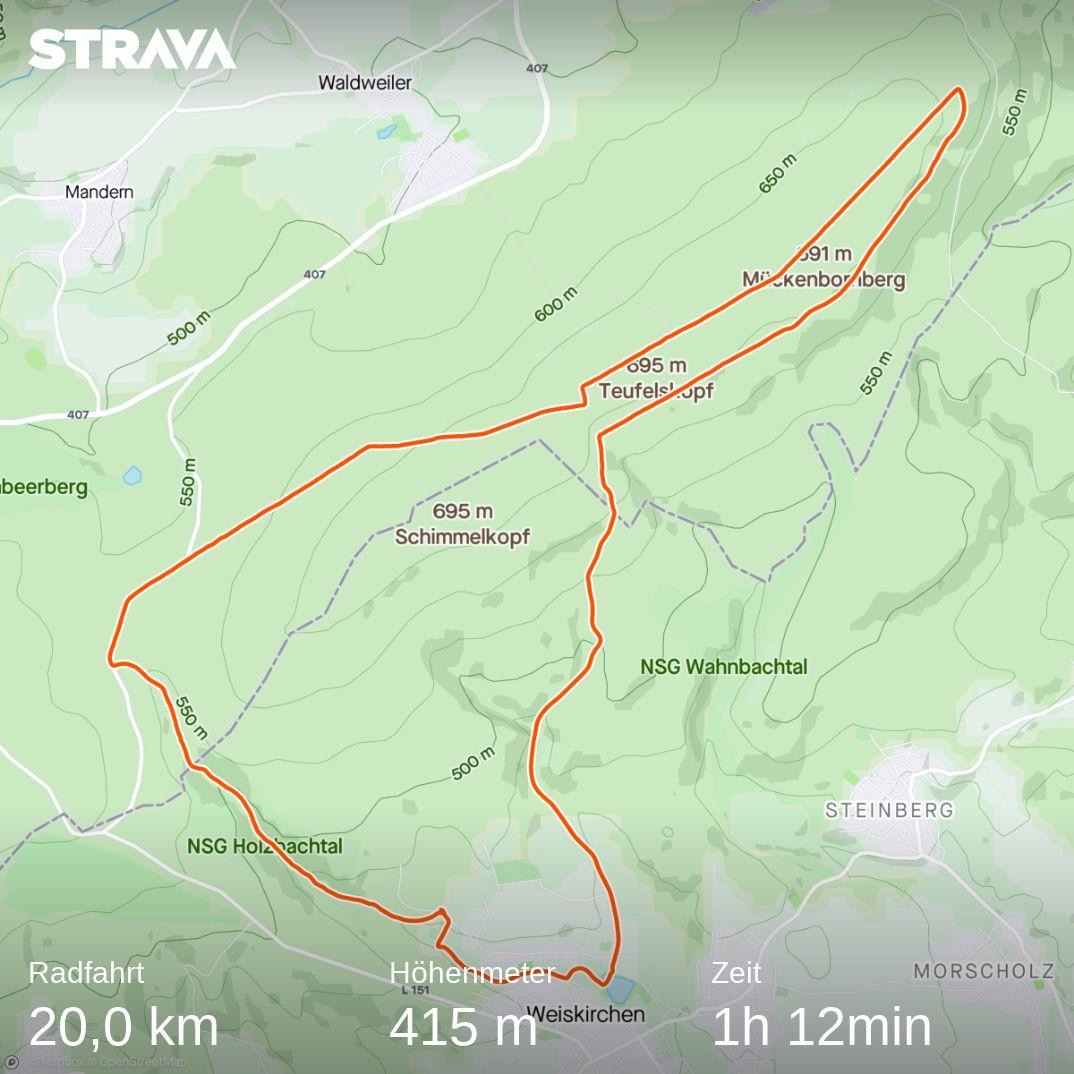
    For this outing I put together a 20 km route that I had ridden before, at least in parts, comprised of fire roads, some root-y singletrack, a few fast descents on what I thought was going to be either fire roads or well-worn foot paths. The bad news is that some of the paths had been shut down years ago and were very much overgrown and hard to navigate, the good news is that I was not only able to try the NANO 40 on loose, muddy, sloshy, puddle-dotted forest roads, I was also treated to a crazy fast descent on a 3 km hard pack and relatively dry gravel road.

    Ride on 20191120

    After finishing the ride, I was left with two dominant feelings from this first experience with the NANO 40:

    1. What an insanely fun ride. These tyres did such a good job and provided loads of grip even in ankle-deep mud.
    2. You idiot. You had considered buying these almost two years ago when you replaced the Schwalbe X-One 33 mm tyres on the Canyon Inflite AL that brought you to gravel cycling in the first place but you didn’t do it because you were too chicken about trying a tubeless setup and the tread looked too aggressive.

    So what did I learn?

    For one that tubeless setups are the way to go for me moving forward, it seems.
    Don’t get me wrong, the Donnelly X’Plor MSO 700×40c 120 TPI tube tyres I’ve ridden so far are crazy good. Having now ridden a properly supple and comparatively aggressively treaded tyre, I appreciate them even more. For a tubed tyre, they are very comfortable and robust even when ridden below the manufacturers specification of ~ 50 psi and they offer great traction within their limits.

    Then there’s the realisation that once the fear of pinch flats is reduced and I embrace lower pressures, it opens up a lot more paths to ride. That said, I am going to increase the pressure in the back wheel for the next ride to 40 psi, because at 38 psi, it sometimes squirmed too much beneath me especially on faster, slightly rockier roads.

    Lastly that I felt the NANO 40 provides a very good mix of a fast rolling 700c tyre and some serious grip on loose ground that the WTB Sendero 47 got me hooked on.

    Oh and they look oh so nice on my bike 😏

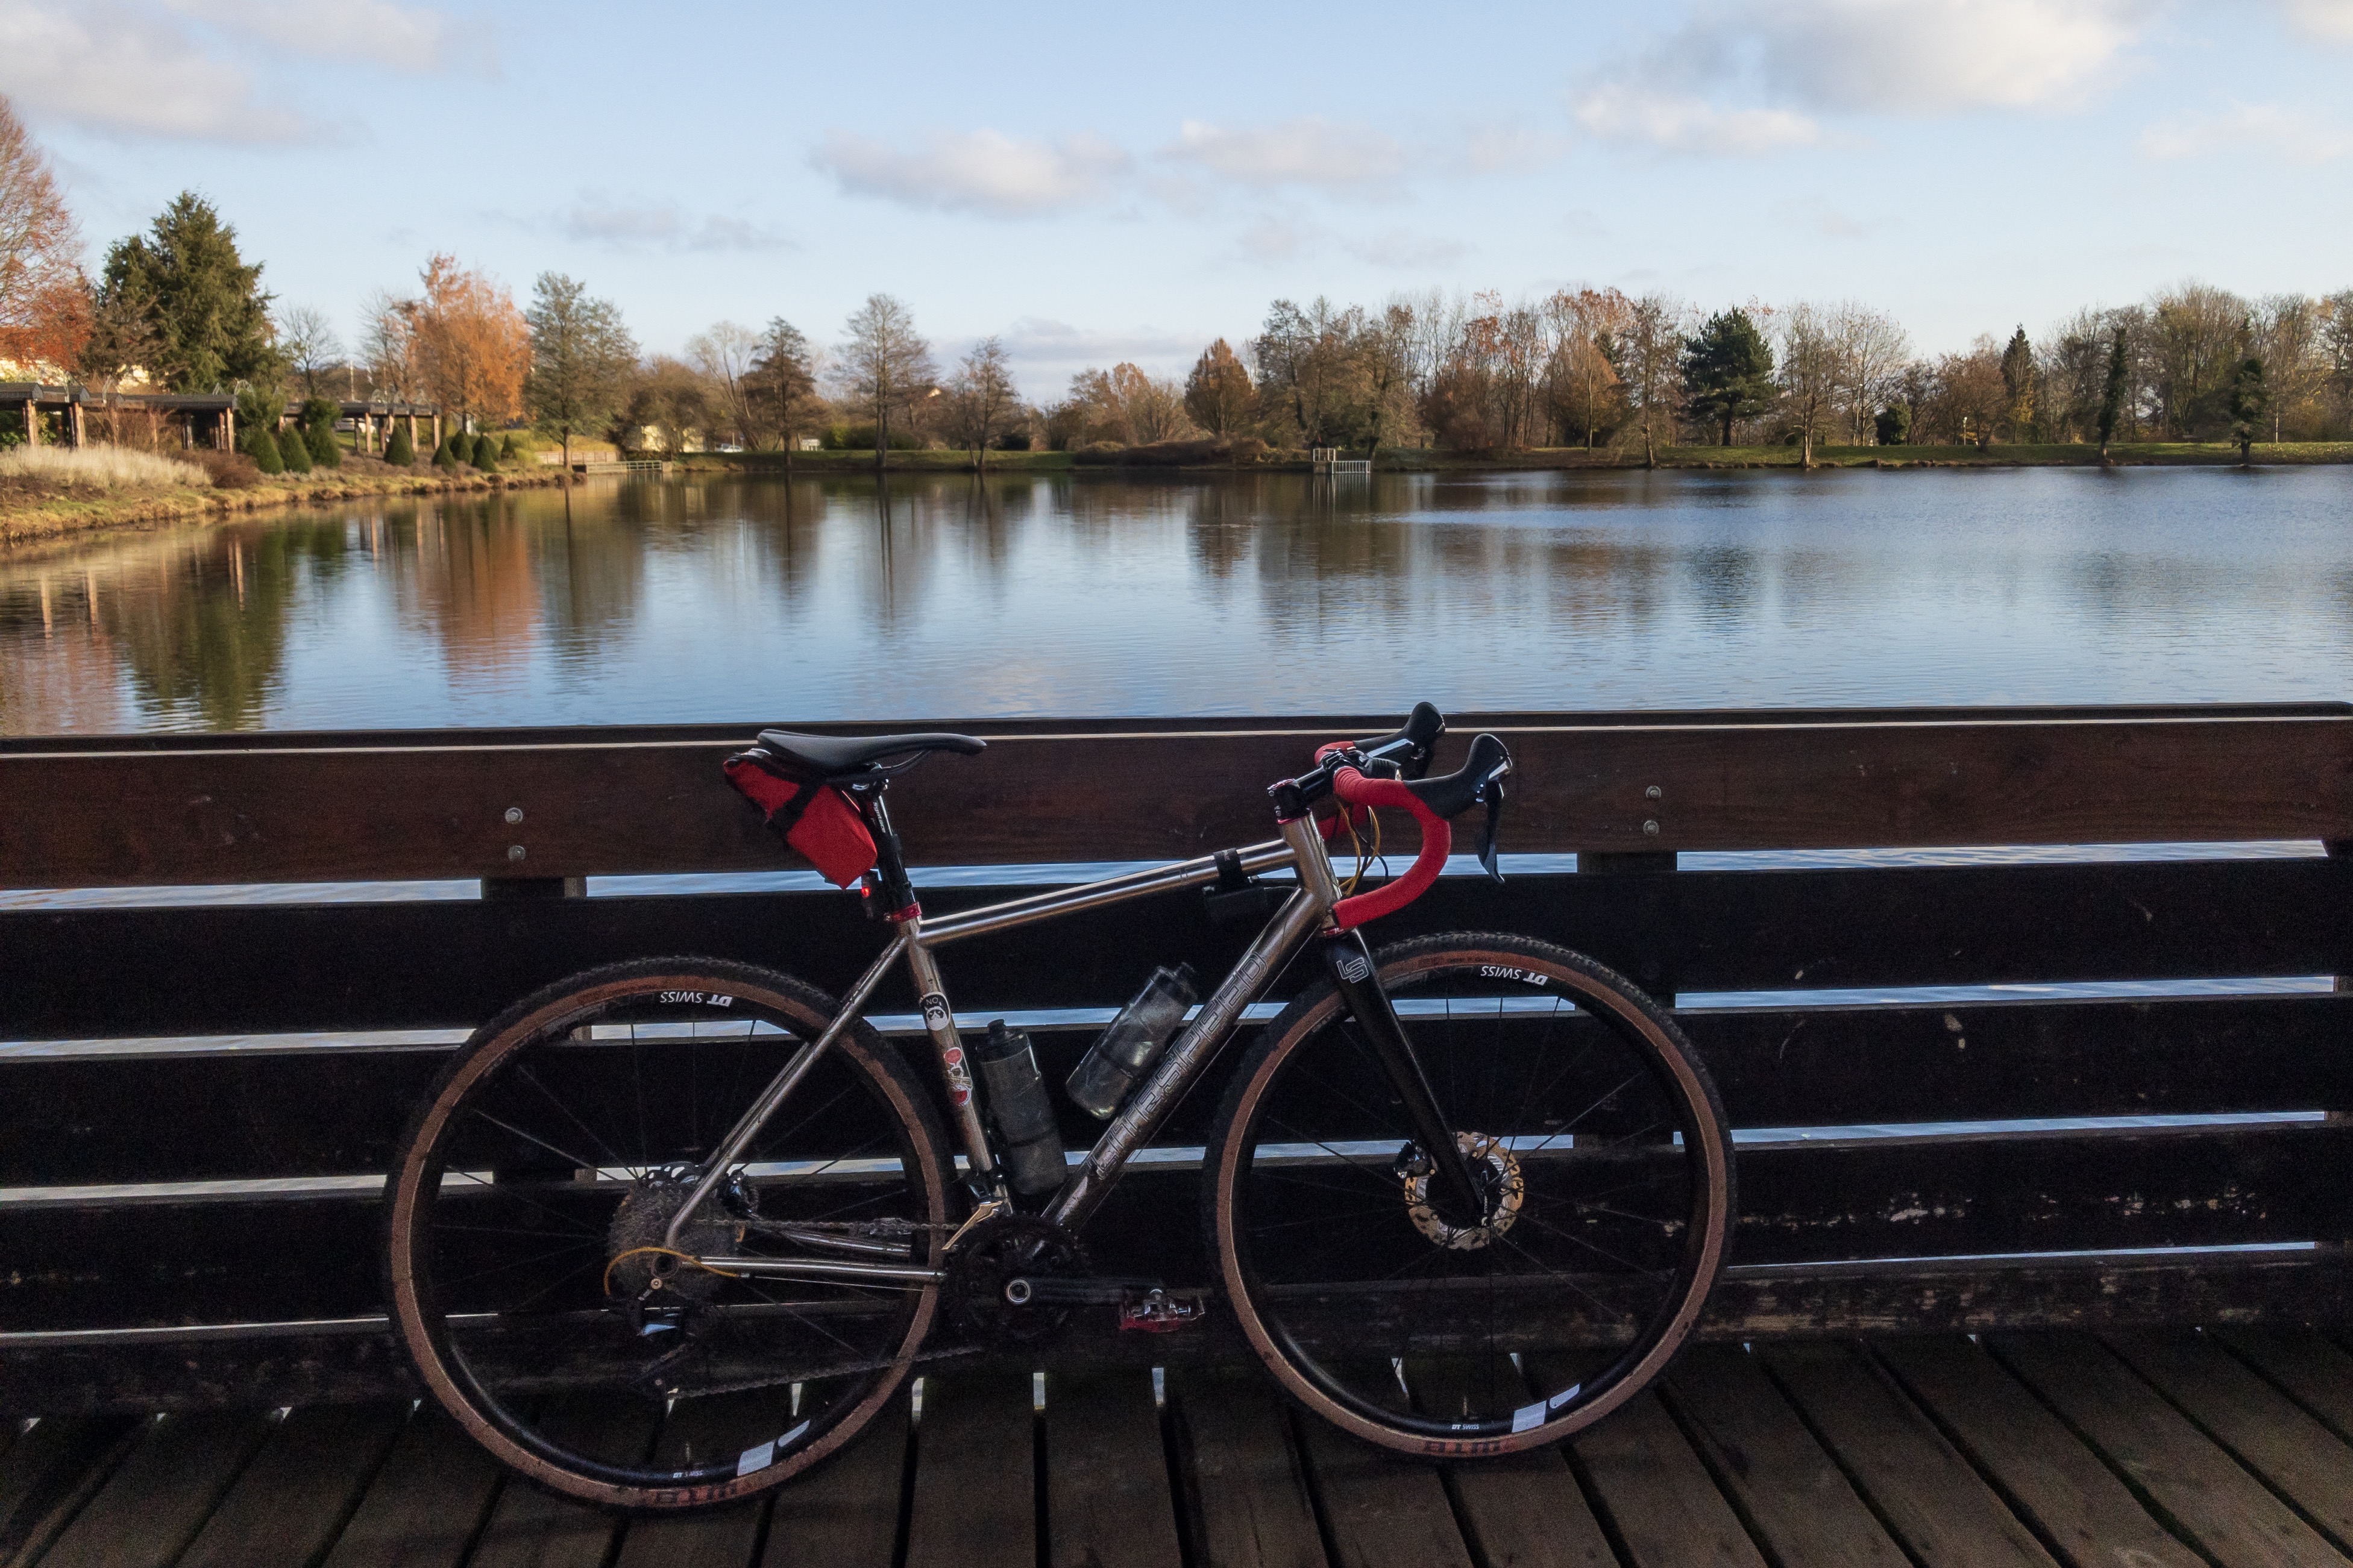
    Battle cat on the bridge over the kurparkweiher in weisskirchen
    → 11:46, 22 Nov 2019
  • Two reviews of the Quoc Gran Tourer gravel cycling shoes and my own two cents

    Two comprehensive reviews of the Quoc Gran Tourer have cropped up on sites that I frequently read.

    Quoc Gran Tourer Review: Rocks, Gravel, Dust, And Puddles
    by Cass Gilbert on Bikepacking.com

    A Summer of Riding in the Quoc Gran Tourer All-Terrain Gravel Bike Shoes
    by John Watson on The Radavist

    I’ve been using the Quoc Gran Tourer for over a year now and up until I saw these two reviews, I had thought of writing my own but I found that the assessment of the shoes by these two persons mirrors my own closely enough that there are only two things I would add:

    1. Fit wise, I have moderately wide feet and I appreciate having ample room in the toe box. The Gran Tourers deliver in this area, all the while the lacing system allows me to perfectly tie the shoes so they’re comfortable yet stay firmly on my feet all day long.
    2. It takes quite a bit for water to seep into these shoes but once they’re wet, it takes very long for them to properly dry.

    I’ve taken these shoes through quite a lot yet they still show only minimal signs of wear on the upper and they’ve only gotten more comfortable with use. I’m very satisfied with the shoes.

    → 16:52, 7 Nov 2019
  • First ride impressions: Salsa Cowchipper gravel bike handlebar

    When I built up my gravel bike, Battle Cat, I decided to stick with the Canyon H17 Al Ergo handlebar at least for a while because I wasn‘t keen on re-wrapping a new bar and I had, up until then, been pretty happy with it. Recent longer outings with more singletrack sections made me curious about the flared drop bars that have become increasingly popular among gravel and cross cyclists. After quite a bit of research, I decided to buy the Salsa Cowchipper Deluxe.

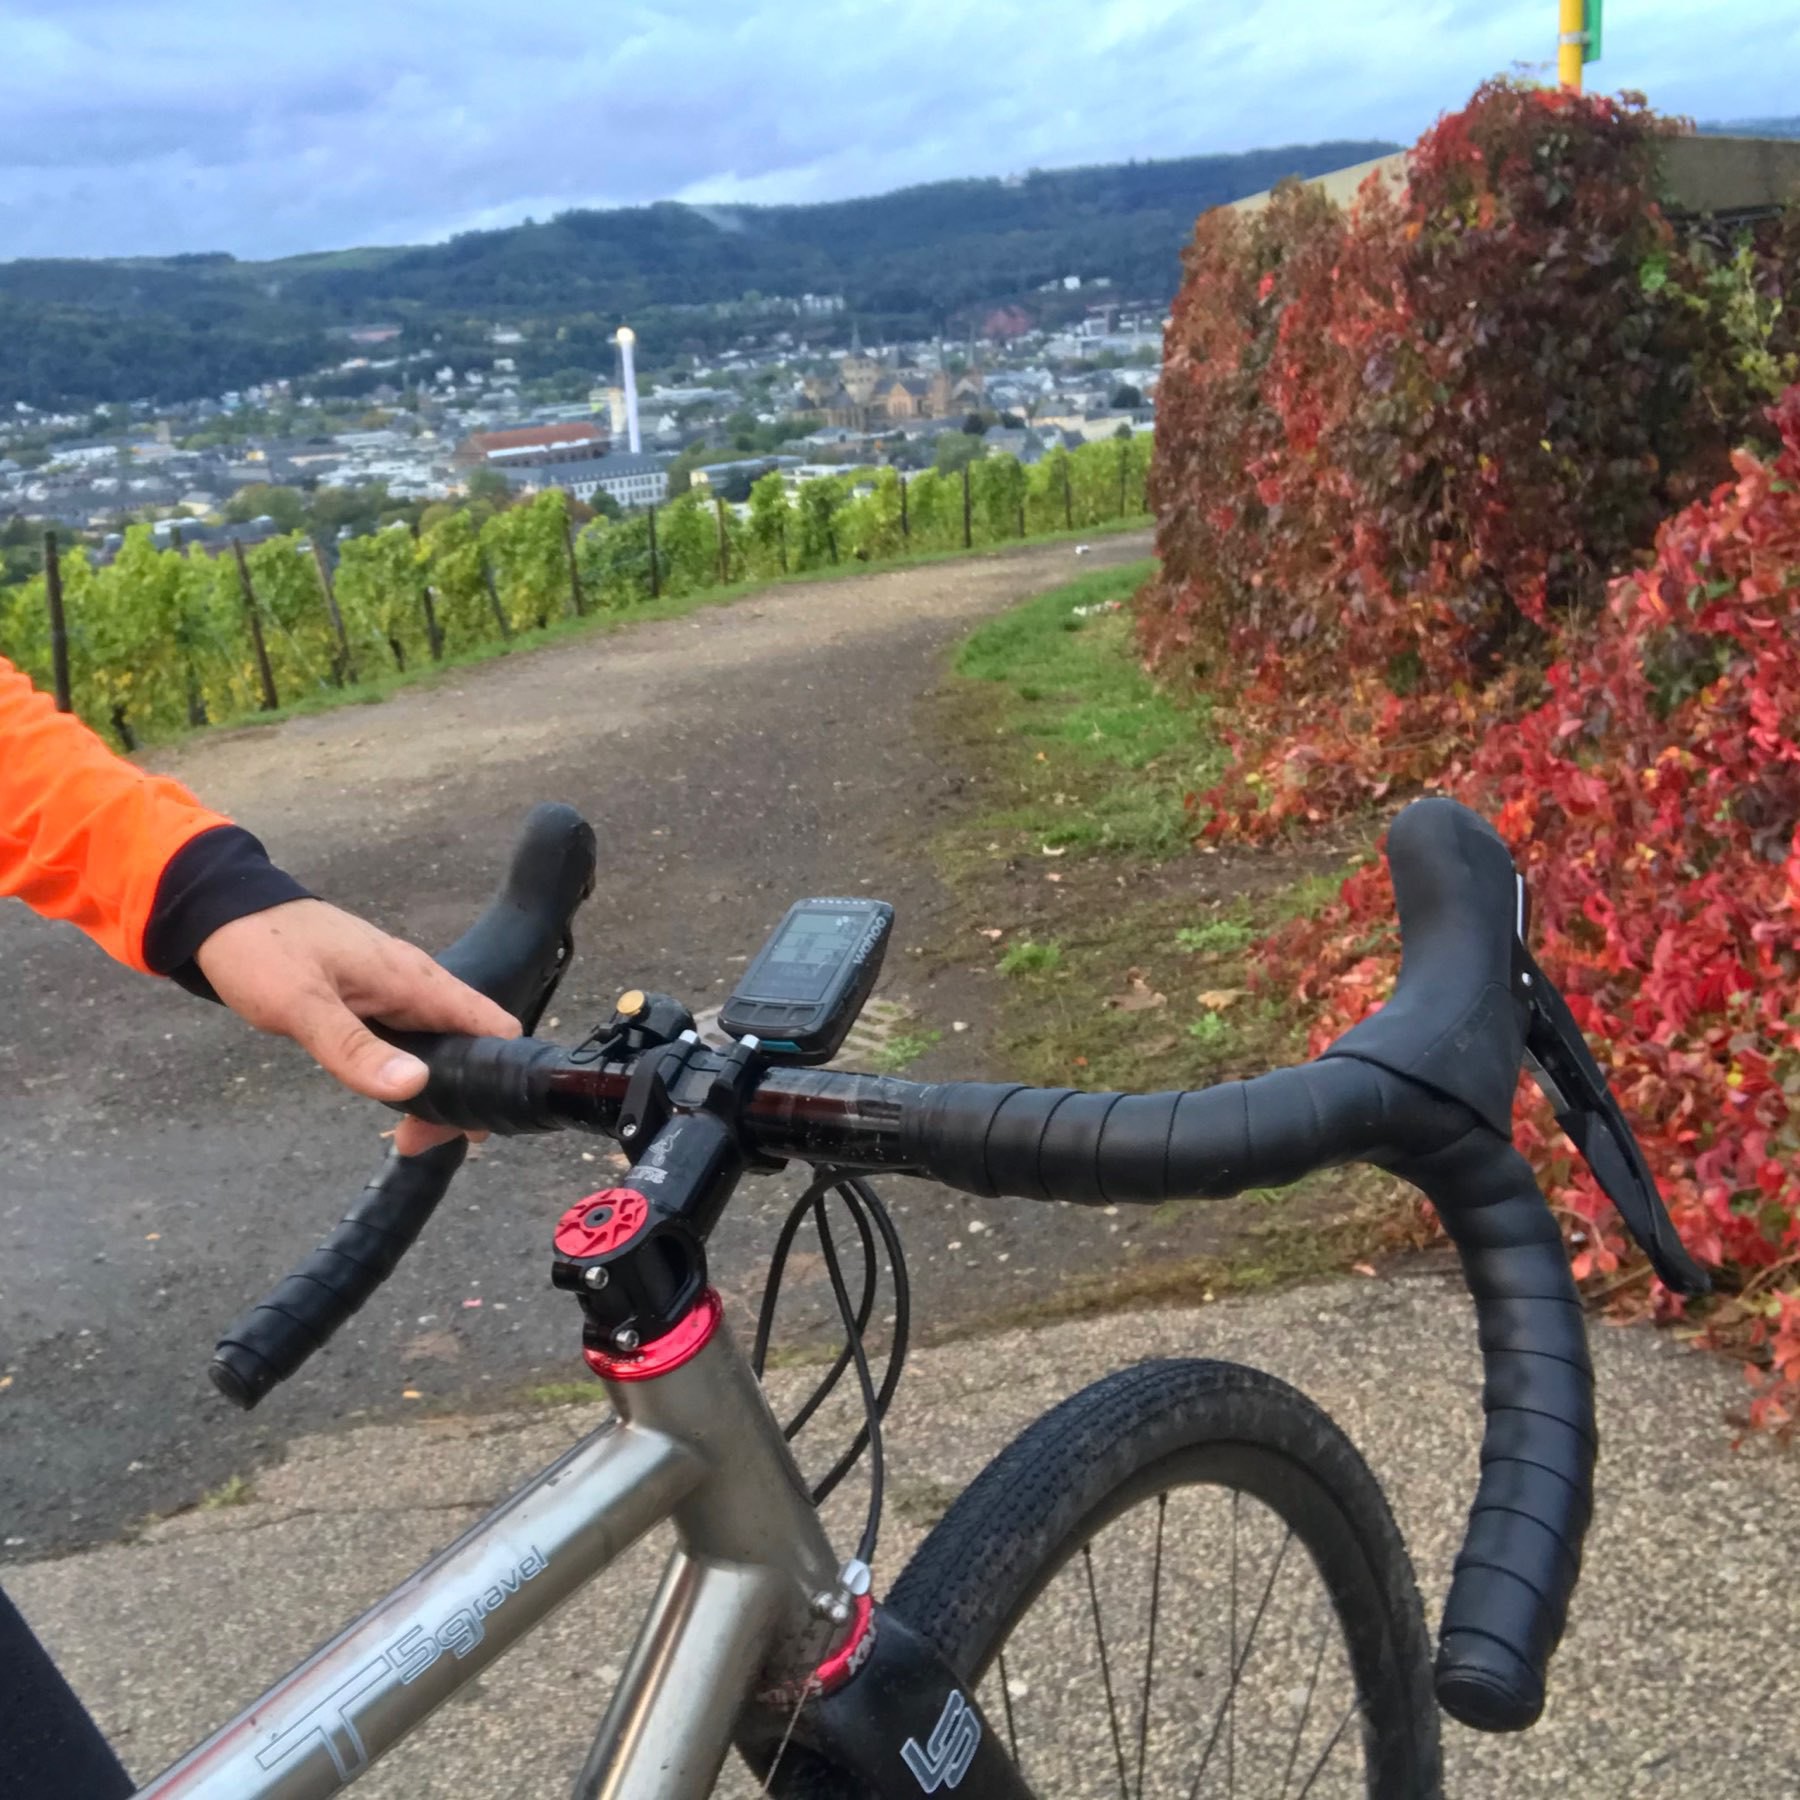
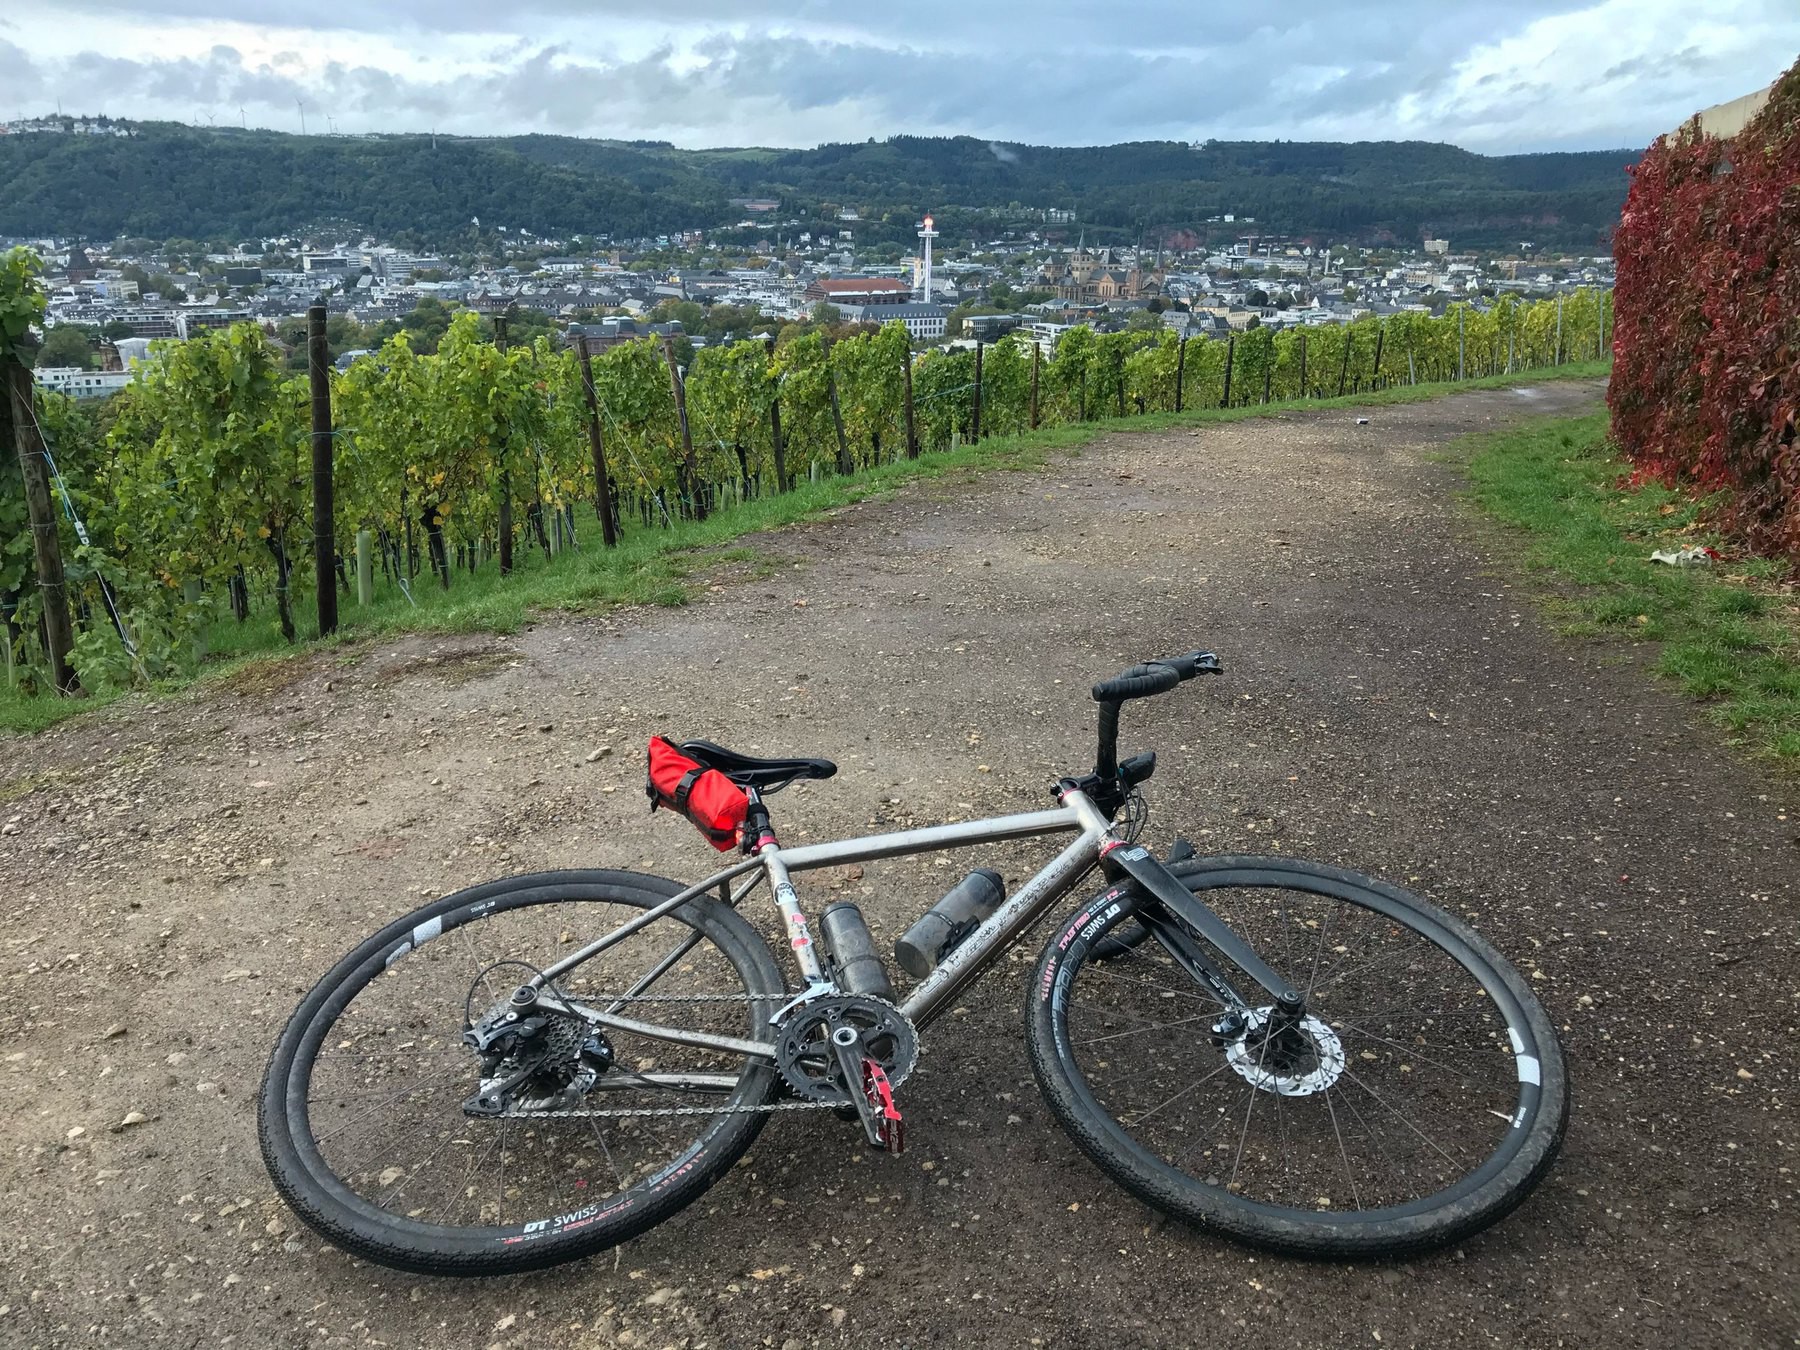
    Yesterday I went out for the first proper ride and the route I picked was a mix of gravel tracks, forest and wine yard paths, and some broken asphalt roads. All of it wet, slippery, loose, and muddy from three days of nearly constant heavy rain.

    On the first kilometre everything felt strange. The suddenly angled hoods and brake levers, the flare of the bars (24°), the different transition from the flat bar to the hood to the drops, and all of it combined with the Tune Dahu Skin bar tape.
    This completely evaporated once I went up the first singletrack climb. The path was parts muddy, parts wet slippery slate pieces that required careful line choice going up and equally careful weight distribution so as not to lose traction riding on 700×40c Donnelly X’Plor MSO tyres already at 3.5 bar.
    The flared bars allowed me to get into a wide and low stance, staying seated the whole time. The first fast decent on a muddy path increased the feeling of control on the bike and sections that I would have typically ridden with my hands on the hoods, I took in the drops because the reduced distance between hoods and drops, combined with the overall different shape of the assembly had me riding less hunched over.

    So far so good. I’m going for a longer gravel ride on the weekend that will hopefully be less wet and I’m looking forward to seeing how I feel about the handlebar after 40+ km in the saddle compared to a quick 16 km ride.

    → 11:14, 10 Oct 2019
  • Quick review: Topeak ROADIE DA G and 700×40c tyres

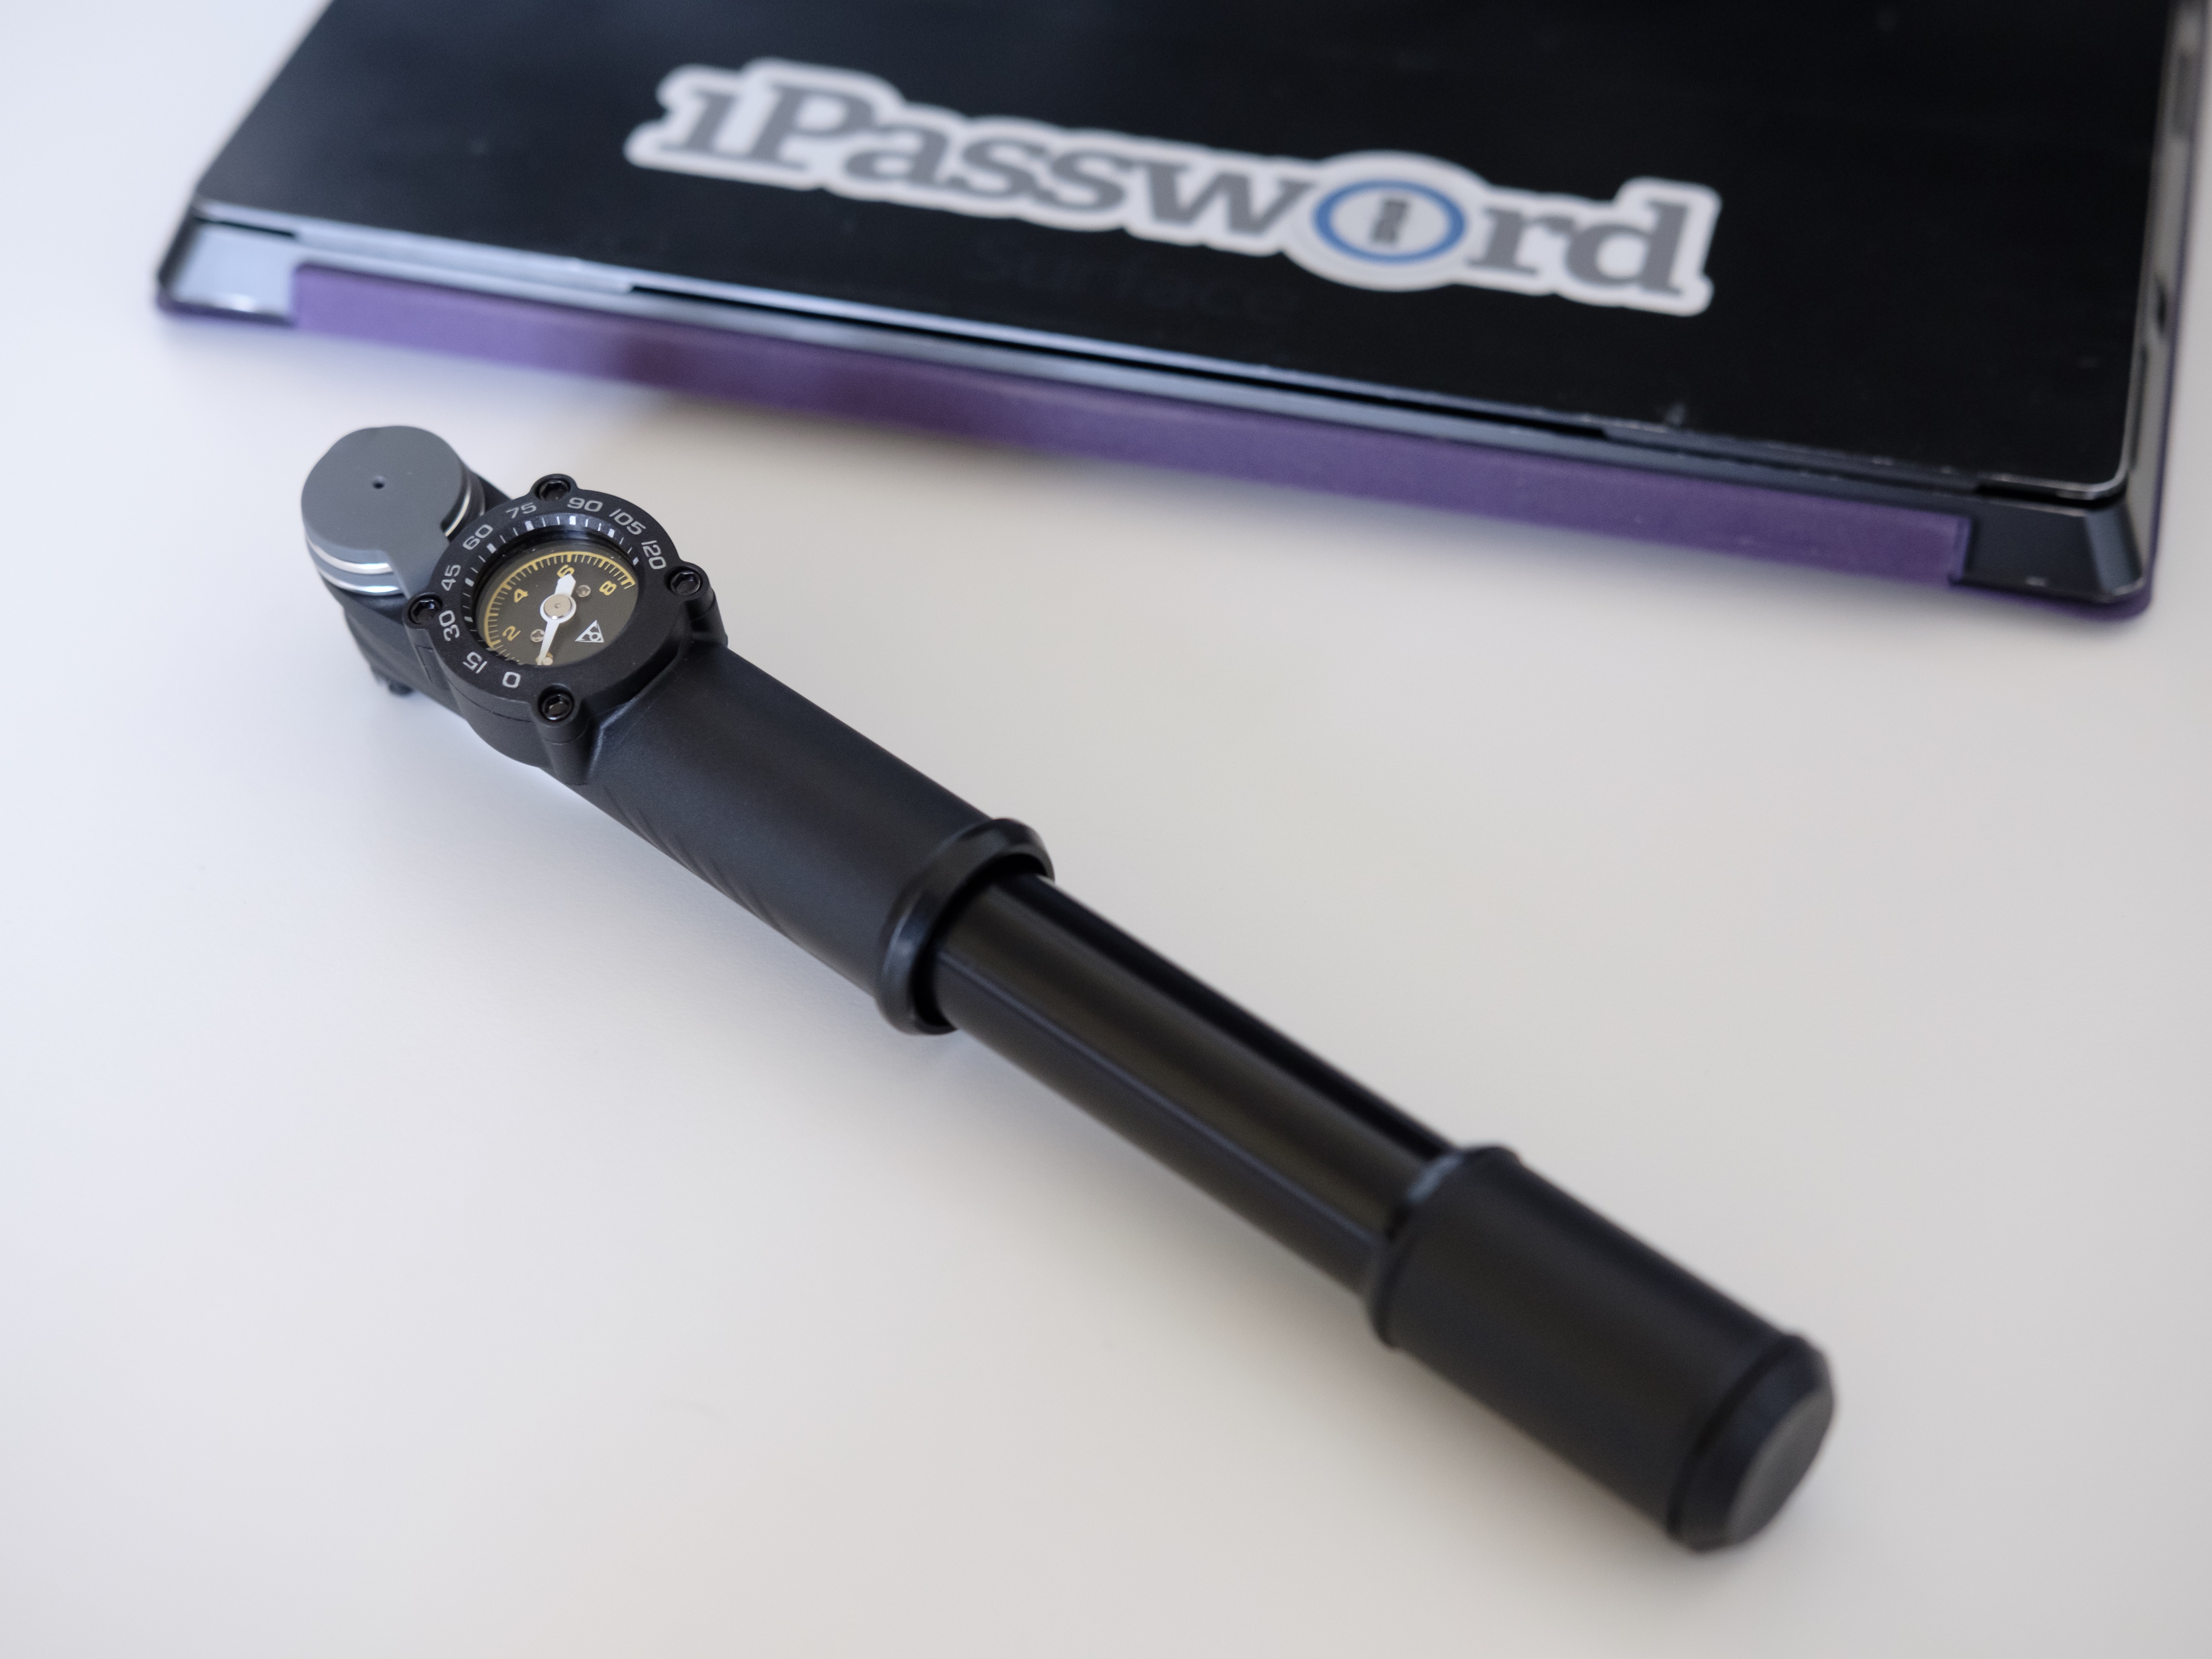
    In your typical cyclist’s quest to simplify my setup and reduce the things that I carry on rides, I went out to look for a compact, pocketable pump with an integrated pressure gauge. There are a number of options, but none of them have had particularly good reviews – at least not judging by what I was able to find. Most annoyingly, very few reviews even consider the accuracy of the integrated gauge, stating that it’s good enough for (off-)road side repairs.

    The Topeak ROADIE DA G is a fairly recent release and being happy with a few other of their products, I decided to give it a go.

    Basics

    The pump pushes air into the tyre when pushing and pulling on the barrel, which, theortically should help fill the tyre more quickly. The barrel is made out of aluminium, other parts of the pump are made from shock-resistant plastic. Being a road bike pump, it’s equipped with a Presta valve head.

    Thoughts

    I’ve used this pump fairly extensively at this point and all things considered, it’s a good pump. It’s compact, doesn’t stick out of a jersey pocket too far and even fits into some saddle bags. The included bottlge cage mount is solid and has held up across a number of hard gravel rides already.

    I was very happy to find that the pressure gauge is quite accurate. Comparing it with a dedicated digital gauge and the gauge in my floor pump, it yielded almost identical results when I aimed to hit 𝑥.0 Bar or 𝑥.𝑥 Bar on the gauge. This allowes me to much more accurately and quickly get my tyres up to the desired pressure than doing the “pump, pump, pump, detach pump, attach gauge, check pressure, detach gauge, pump some more, check again” spiel.

    One thing I consider a downside is the pump’s barrel getting very hot when reaching pressures of 3.2 Bar and up. I’m guessing it’s fine when you’re wearing gloves but more than a couple of times when nearing 4 Bar, I had to stop pumping to let the barrel cool down a bit.

    Suitability for 700×40c tyres

    The bigger issue from my perspective is the suitability for tyres typically used on gravel bikes. Both my bikes use 700×40c and I tend to vary the pressure depending on the terrain I ride on. Getting this kind of pneu to a pressure beyond 3.5 Bar is hard work and both the pump and I struggle with it.

    This issue isn’t limited to the ROADIE DA G, however. Right now, most manufacturers of pumps distinguish between high-volume pumps for mountain bike tyres, and high-pressure pumps for road bikes. Tyres for gravel bikes/adventure bikes/bicycle touring fall somewhere in between and I haven’t yet seen any pump that delivers good results for 700×36c–700×50c tyres.

    → 09:48, 4 Sep 2019
  • Eddycam 35mm camera strap + Peak Design Anchor Links

    My favourite camera strap by a long shot is the Eddycam Edition "35mm" in all black. It's comfortable, robust, and the design is understated. I bought it alongside my Fujifilm X-Pro2 last year and kept it on the camera since then.

    As much as I like this strap, there are two downsides to carrying my camera with a strap attached to the eyelets on either side of the body:

    • When using heavier lenses on the body, the camera becomes front-heavy, making it dangle uncomfortably when carried over the shoulder, around the neck, and diagonally across the body.
    • I can't switch to using a wrist strap in those rare situations when I want to and wrapping the neck strap around my wrist is impractical and doesn't give me the secure feeling a wrist strap does.

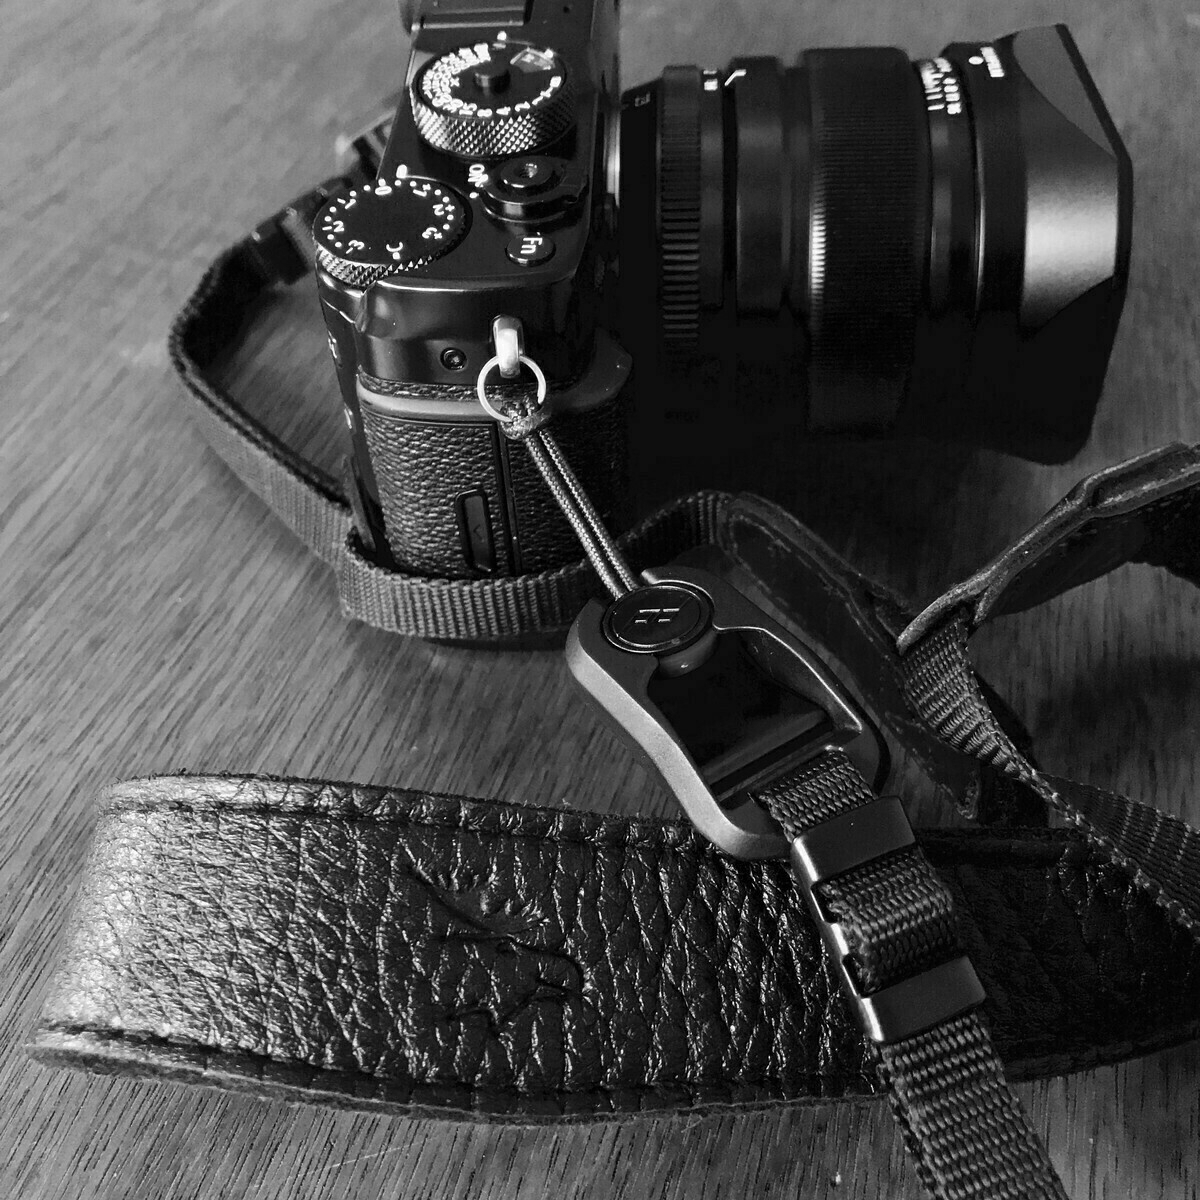
    After a bit of searching for a quick-release solution to attach my Eddycam to, I ended up with the Peak Design Anchor Links. I have a couple Peak Design camera accessories and straps and their quick connectors are second to none. The system is a bit bulky which was my one small, but ultimately unfounded, concern about pairing the Anchor Links with the Eddycam 35mm strap: it might've ruined the clean looks of the X-Pro2 + black Eddycam strap combination.

    X-Pro2 + Eddycam + Peak Design 01

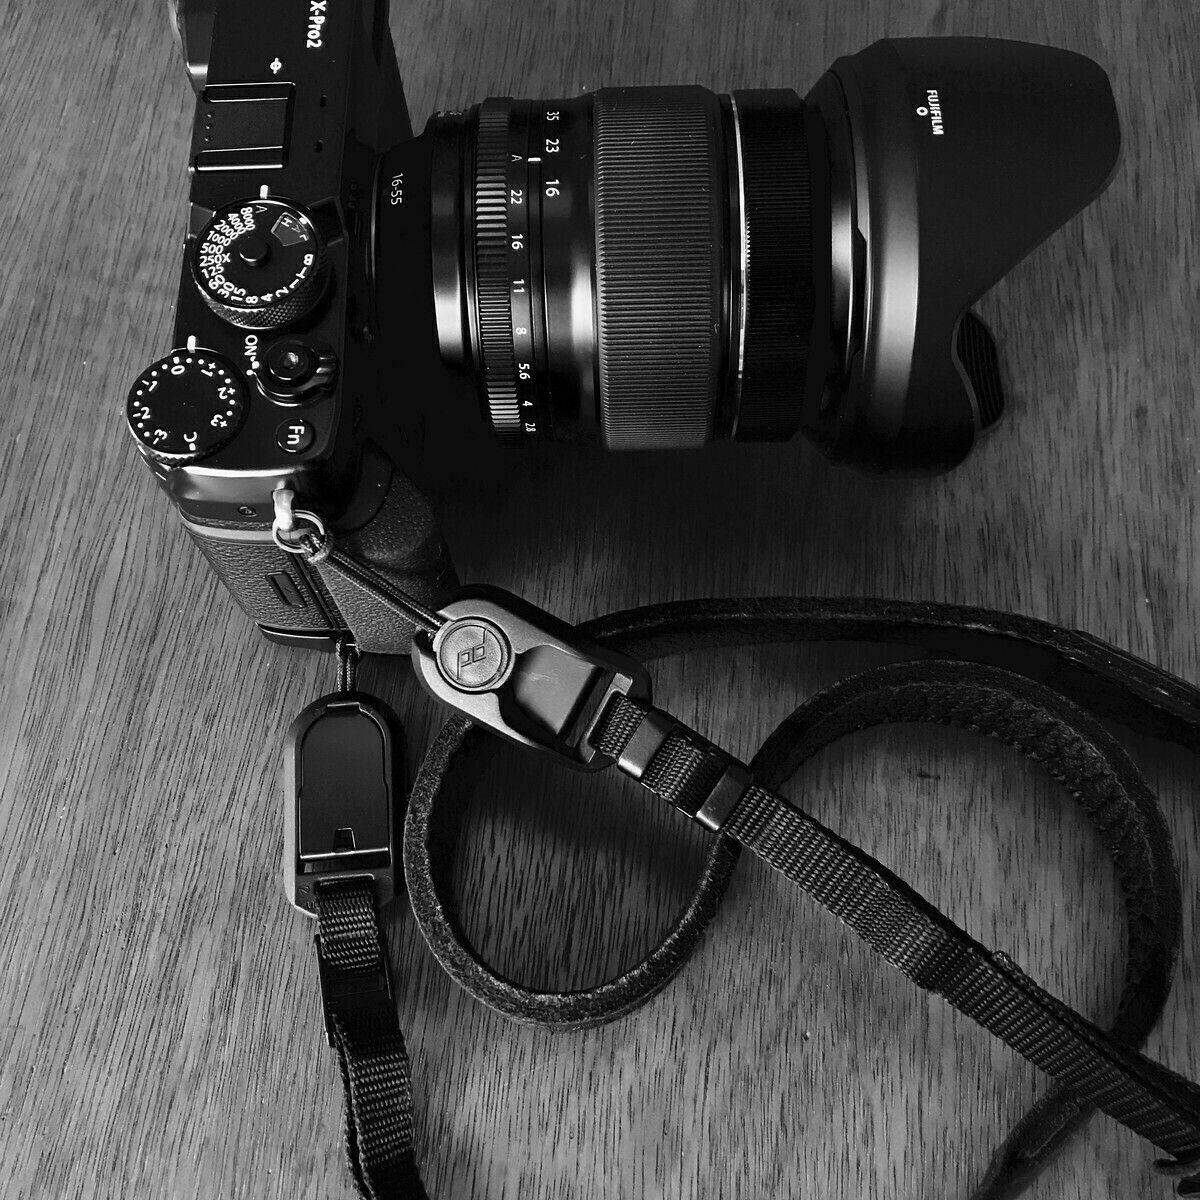
    The big benefit of using a quick connector system like the Peak Design Anchor Links, is having a new option to carry my camera when attaching larger lenses like the XF16-55mmF2.8 R LM WR zoom, or the XF90mmF2 R LM WR. If I'm going to be using either of those lenses for a significant amount of time, I always attach the additional hand grip MHG-XPRO2 to my camera, which has a little gap on the right side of the base that is perfect for attaching one of the Anchor Disks — I'm honestly not sure if this is an intentional feature of the hand grip, but it's undeniably useful :)

    X-Pro2 + Eddycam + Peak Design 02

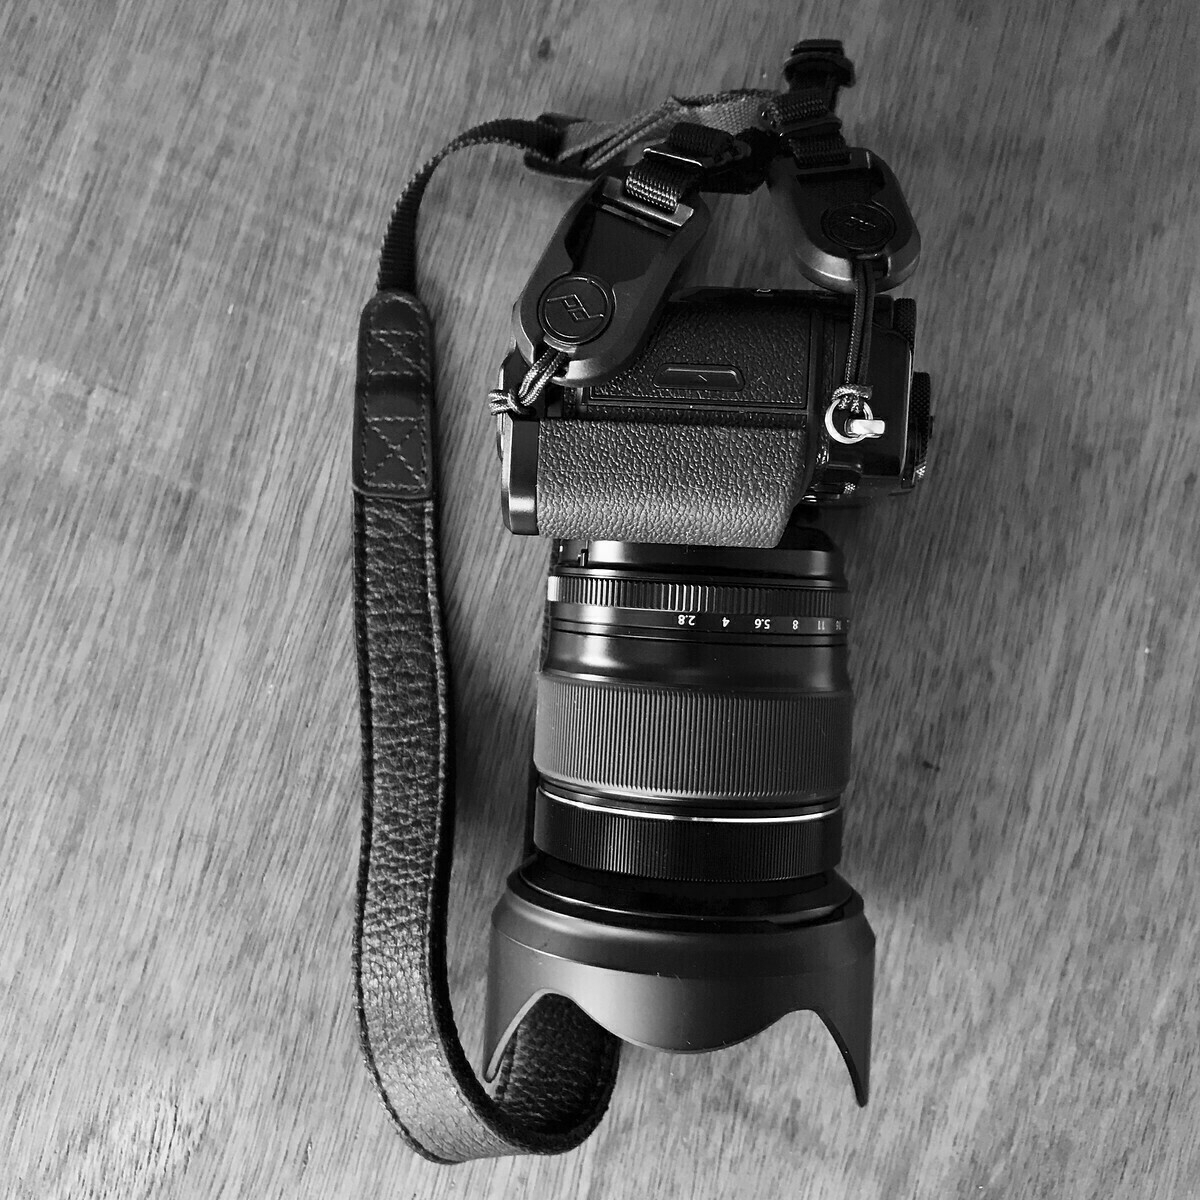
    With the strap attached to one of the eyelets on the camera and the small gap in the hand grip, the camera will now hang vertically on my side, making the combination more stable and comfortable to carry.

    X-Pro2 + Eddycam + Peak Design 03

    I'm really happy with the result of this experiment and the increased versatility of this camera strap setup. The only thing missing now is an Eddycam wrist strap with an Anchor Link, as I don't find the Peak Design wrist strap very comfortable.

    → 15:35, 24 Apr 2017
  • Lauren Lim reviews the Fujifilm X-Pro2

    This is a great review of the Fujifilm X-Pro2. It's especially good for people who want to know what's with the fuss about Fujifilm cameras.

    I've been shooting with Fujifilm cameras for two over two years now and it's still interesting to hear from people passionate about photography, discover Fujifilm cameras for the first time, getting used to the "retro" way of adjusting the core settings, being subjected to the way Fujifilm cameras and lenses render colours and light, and realising that the JPEGs that come out of the cameras pretty damn good.

    Head over to her website to read the written review and check out the sample photos she posted.

    Found on: Tomen.de

    → 18:55, 12 May 2016
Page 1 of 2 Older Posts →
  • RSS
  • JSON Feed
  • Micro.blog